Natural stone surfaces have grown in popularity throughout the home. Choosing sturdy and sophisticated surfaces for your countertops and backsplashes adds an unmatched level of beauty to any kitchen.
Granite
Made from natural igneous rock, granite is a durable and distinctive countertop surface for kitchen remodeling projects in the Bay Area. It has a different look when polished, adding a look of elegance to kitchens and baths. Variegated, or veined, granite has deep contrasting colors. Consistent, or speckled, granite offers depth and texture.
Marble
Some people simply can’t resist the appeal of marble. A softer surface, it is equally beautiful but not as durable as other kitchen countertop surfaces. It will pick up stains and nicks, so if you plan to do much meal preparation, other surfaces are probably better suited. Marble should be sealed at least once a year to help it wear better.
Quartz
Quartz is a natural crystallized mineral surface that is a popular countertop option in kitchens and baths for Bay Area remodeling projects. It is an alternative to natural stone that that offers a different look and sophistication. Quartz is a naturally occurring mineral in crystalline form. It can be cut in slabs from the quarry, but it more commonly appears as engineered quartz ordered through a manufacturer or distributor to create a beautiful and sturdy countertop surface.
Silestone®
As the largest producer of quartz surfaces, Silestone® offers a diverse range of more than 60 colors and patterned countertop finishes. It is available in single-dimensional, three-dimensional and five-dimensional color processing for added depth.
Microban®
Microban® is an anti-microbial technology built into kitchen countertops. You’ll find it in Silestone quartz countertops and in other products. It minimizes the presence of bacteria, fungi and mold, which is always good for kitchen and bath surfaces. When a quartz countertop is treated with the protective Microban technology, it’s permanent. It doesn’t wipe off or wash away.
Zodiaq®
Zodiaq® quartz surfaces are made by DuPont™. This scratch-resistant and heat-resistant engineered quartz crystal surface is rich in depth. It, too, is available in a wide array of colors and textures. Zodiaq®
is well-known for its brilliant colors.
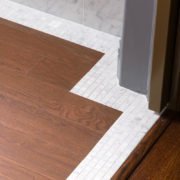
Natural stone countertops can be coordinated with other surfaces in the home during your design and build remodeling project. It’s also a fashionable choice for flooring, walls, tabletops, vanities and backsplashes. Despite the material’s popularity, it is rare to find two stone surfaces in different Bay Area homes that ever look alike.